
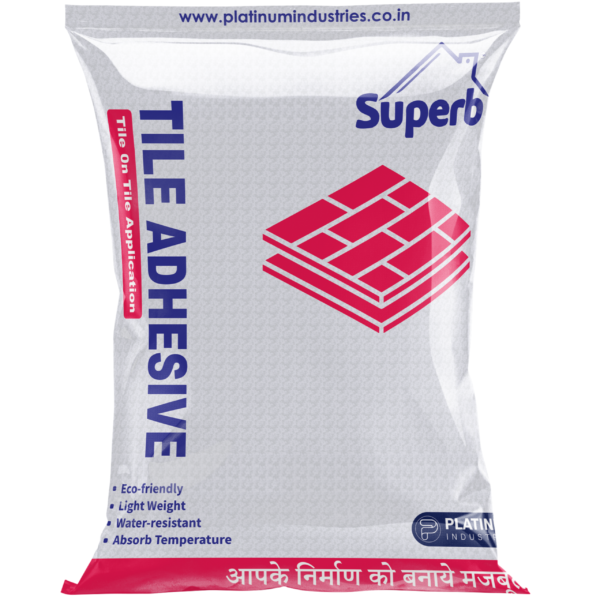

T2 – TILE ON TILE ADHESIVE
EN 12004 Classification: C2T
At a Glance
| Feature | Details |
| Ideal For | Tile-on-Tile Renovation |
| Tile Size | Up to 600 × 600 mm |
| Application | Existing Tile over Existing Tile |
| Suitable Surfaces | Existing Ceramic & Vitrified Tiles, Cement Plaster & Concrete |
| Walls | Up to 10 ft |
| Floors | Residential & Commercial |
| Interior | ✔ Yes |
| Exterior | ✔ Yes (Protected Areas) |
| EN Classification | C2T |
| Bond Strength | Improved (≥1.0 MPa) |
| Ready Mix | Just Add Water |
Give Your Old Tiles a Brand-New Life—Without Breaking Them
Beverly Hills T2 Tile-on-Tile Adhesive is a high-performance polymer-modified cementitious adhesive specially developed for fixing new tiles directly over existing tiled surfaces. It eliminates the need to remove old tiles, reducing demolition, dust, noise, labour costs, and renovation time.
Whether renovating a home, upgrading a commercial space, or modernizing interiors, T2 delivers exceptional adhesion on both old tiled surfaces and fresh cement-based substrates, making renovation faster, cleaner, and more economical.
Best Suited For
Residential Renovations
- Living Rooms
- Bedrooms
- Kitchens
- Bathrooms
- Dining Areas
- Utility Rooms
- Balconies
- Staircases
- Passage Areas
Commercial Renovations
- Offices
- Shops
- Restaurants
- Hotels
- Clinics
- Hospitals
- Schools
- Retail Stores
- Reception Areas
- Showrooms
Suitable Tile Types
✔ Ceramic Tiles
✔ Glazed Tiles
✔ Vitrified Tiles
✔ Porcelain Tiles (Medium Format)
Maximum Recommended Tile Size
Up to 600 × 600 mm
Suitable Substrates
Can be applied over:
- Existing Ceramic Tiles
- Existing Vitrified Tiles
- Cement Plaster
- Concrete
- Cement Screed
- Cement Mortar Beds
Provided the existing surface is clean, sound, and firmly bonded.
Where This Product Should NOT Be Used
This adhesive is not recommended for:
- Large Format Slabs
- Natural Stone
- Glass Mosaic
- Metal Surfaces
- Wooden Floors
- Gypsum Boards
- Fiber Cement Boards
- Swimming Pools
- Constant Water Immersion
- High-rise Exterior Cladding
For these applications, choose the appropriate Beverly Hills Tile Adhesive grade.
Why Choose T2?
- No need to remove existing tiles
- Saves demolition and disposal costs
- Reduces renovation time significantly
- Minimizes dust and construction debris
- Excellent adhesion on old tiled surfaces
- Stronger bonding than conventional cement mortar
- Slip-resistant for wall applications
- Ready to use—just add clean water
- Easy to spread with excellent workability
- Ideal for residential and commercial renovation projects
Typical Performance Characteristics (Benchmark Reference)
| Property | Typical Value |
| EN Classification | C2T |
| Colour | Grey |
| Base Material | Cement + Graded Silica + High Polymer Content |
| Mixing Water | 24–26% |
| Pot Life | 2–3 Hours |
| Open Time | ≥30 Minutes |
| Adjustment Time | 20–25 Minutes |
| Slip | ≤0.5 mm |
| Tensile Adhesion (Dry) | ≥1.5 MPa |
| Tensile Adhesion After Water Immersion | ≥1.0 MPa |
| Tensile Adhesion After Heat Ageing | ≥1.0 MPa |
| Tensile Adhesion After Freeze-Thaw* | ≥1.0 MPa |
| Service Temperature | -30°C to +70°C |
| Foot Traffic | After 24 Hours |
| Grouting | 24 Hours (Walls), 24–48 Hours (Floors) |
| Full Cure | 14 Days |
| Packaging | 20 kg Bag |
| Shelf Life | 12 Months |
*Where applicable.
Approximate Coverage
| Notched Trowel | Approximate Coverage (20 kg Bag) |
| 6 × 6 mm | 50–60 sq.ft. |
| 8 × 8 mm | 38–45 sq.ft. |
| 10 × 10 mm | 28–35 sq.ft. |
Practical Site Estimate
Approximately 2 bags per brass, depending on tile size, substrate condition, and application method.
Mixing Instructions
- Use approximately 5.0–5.2 litres of clean water per 20 kg bag.
- Mix using a slow-speed mechanical mixer until a smooth, lump-free consistency is obtained.
- Allow the adhesive to mature for 3–5 minutes, then remix briefly before use.
- Do not add extra water after the adhesive begins to set.
Application Procedure
Step 1 – Surface Inspection
Ensure existing tiles are firmly bonded. Remove any loose, hollow, cracked, or damaged tiles before installation.
Step 2 – Surface Preparation
Clean the existing tiled surface thoroughly to remove grease, wax, soap residue, dust, paint, polish, or other contaminants. Lightly roughening glossy tiles can further improve mechanical adhesion.
Step 3 – Mixing
Prepare the adhesive according to the recommended water ratio until a smooth, workable consistency is achieved.
Step 4 – Adhesive Application
Spread the adhesive evenly using an appropriate notched trowel. For larger or low-porosity tiles, back-buttering is recommended to achieve maximum contact.
Step 5 – Tile Installation
Press the tile firmly with a slight twisting motion to ensure full adhesive transfer. Use spacers to maintain uniform joints.
Step 6 – Finishing
Allow adequate curing before grouting or opening the surface to traffic.
Best Practices
✓ Check existing tiles for soundness before installation.
✓ Remove all loose tiles before beginning work.
✓ Clean glossy tile surfaces thoroughly.
✓ Use the appropriate notched trowel.
✓ Periodically lift a tile to verify full adhesive coverage.
Avoid These Mistakes
✗ Installing over loose or hollow existing tiles.
✗ Applying on greasy, polished, or contaminated surfaces without cleaning.
✗ Adding cement or sand to the adhesive.
✗ Adding water after the adhesive begins setting.
✗ Exceeding the recommended tile size.
Product Selection Guide
Choose T2 Tile-on-Tile Adhesive when:
- Renovating existing tiled floors or walls.
- Fixing new tiles directly over old tiles.
- Installing tiles up to 600 × 600 mm.
- Working in residential or commercial renovation projects.
- Demolition needs to be avoided.
Pro Tip: Before installing new tiles over old ones, tap the existing tiles with a rubber mallet. Hollow-sounding or loose tiles should be removed and repaired before fixing new tiles to ensure a durable installation.



Reviews
There are no reviews yet.