
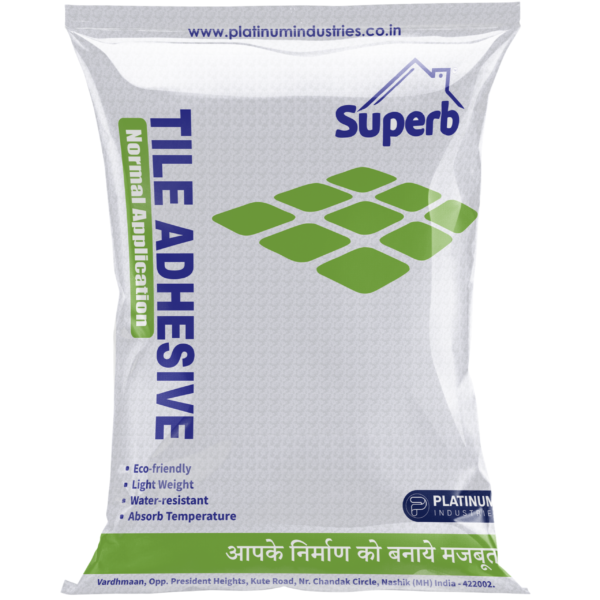
T1 – NORMAL TILE ADHESIVE
EN 12004 Classification: C1T
Everyday Tile Fixing Made Strong, Reliable & Hassle-Free
Beverly Hills T1 Normal Tile Adhesive is a premium-quality polymer-modified cementitious adhesive specially formulated for fixing ceramic and small-format vitrified tiles on cement-based surfaces. Designed for everyday residential and commercial construction, it provides stronger bonding, easier application and longer-lasting tile installations than conventional cement-sand mortar.
Whether you’re constructing a new home, renovating a room, or tiling a commercial space, T1 ensures consistent adhesion, reduced tile failures, and professional-quality installation
Product Selection Guide
Choose T1 Normal Tile Adhesive when:
- Tile size is up to 500 × 500 mm
- Fixing ceramic or small vitrified tiles
- Installing on fresh cement-based surfaces
- Internal wall (uptil 10ft. only ) and floor applications
- Standard residential and commercial projects
Practical Site Estimate:
Approximately 2 bags per brass under normal installation conditions.
Actual consumption depends on substrate levelness, tile size, trowel notch size, and installer technique.
Best Suited For
Residential Areas
- Living Rooms
- Bedrooms
- Kitchens
- Bathrooms
- Dining Areas
- Utility Areas
- Internal Staircases
- Passage Areas
- Covered Balconies
- Verandahs
Commercial Areas
- Shops
- Offices
- Schools
- Clinics
- Hospitals
- Hotels
- Restaurants
- Reception Areas
- Retail Stores
- Small Commercial Buildings
Suitable Tile Types
✔ Ceramic Wall Tiles
✔ Ceramic Floor Tiles
✔ Glazed Ceramic Tiles
✔ Small Format Vitrified Tiles
Maximum Recommended Tile Size
Up to 500 × 500 mm
Suitable Substrates
Apply directly on properly cured and prepared:
- Cement Plaster
- Concrete
- Cement Mortar Beds
- Cement Screeds
Where This Product Should NOT Be Used
This adhesive is not recommended for:
- Tile-on-Tile Installation
- Large Format Tiles
- Porcelain Slabs
- Glass Mosaic
- Natural Stone
- Metal Surfaces
- Wooden Floors
- Gypsum Boards
- Fiber Cement Boards
- Constant Water Immersion Areas
- Swimming Pools
For these applications, choose the appropriate Beverly Hills Tile Adhesive grade.
Why Choose Normal Tiles Adhesive?
- Stronger bonding than conventional cement mortar
- Ready to use—just add clean water
- Excellent workability for faster installation
- Reduced tile slippage on walls
- Better coverage with less material wastage
- Uniform adhesive bed for improved load distribution
- Reduces hollow sounding tiles
- Improves long-term durability
- Economical solution for everyday tile fixing
- Suitable for both wall and floor applications
Typical Performance Characteristics (Benchmark Reference)
| Property | Typical Value |
| EN Classification | C1T |
| Colour | Grey |
| Base Material | Cement + Graded Silica + Polymer Additives |
| Mixing Water | 24–26% by weight |
| Pot Life | 2–3 Hours |
| Open Time | ≥20 Minutes |
| Adjustment Time | 15–20 Minutes |
| Slip | ≤0.5 mm |
| Tensile Adhesion (Dry) | ≥1.0 MPa |
| Tensile Adhesion After Water Immersion | ≥0.5 MPa |
| Tensile Adhesion After Heat Ageing | ≥0.5 MPa |
| Service Temperature | -30°C to +70°C |
| Foot Traffic | After 24 Hours |
| Grouting | After 24 Hours (Walls) / 24–48 Hours (Floors) |
| Full Cure | 14 Days |
| Packaging | 20 kg Bag |
| Shelf Life | 12 Months in Unopened Bag |
Approximate Coverage
| Notched Trowel | Approximate Coverage (20 kg Bag) |
| 6 × 6 mm | 50–60 sq.ft. |
| 8 × 8 mm | 38–45 sq.ft. |
| 10 × 10 mm | 28–35 sq.ft. |
Mixing Instructions
- Use clean, potable water only.
- Add approximately 5.0–5.2 litres of water per 20 kg bag.
- Mix using a slow-speed mechanical mixer until a smooth, lump-free consistency is achieved.
- Allow the mix to stand for 3–5 minutes, then remix briefly before application.
- Do not add extra water after the adhesive has begun to set.
Application Procedure
Step 1 – Surface Preparation
Ensure the substrate is structurally sound, cured, clean, level, and free from dust, oil, grease, paint, curing compounds, or loose particles.
Step 2 – Mixing
Prepare the adhesive according to the recommended water ratio until a smooth paste is obtained.
Step 3 – Adhesive Application
Spread the adhesive evenly using a suitable notched trowel while holding it at approximately 45°.
Step 4 – Tile Fixing
Press the tile firmly with a slight twisting motion to achieve full adhesive contact. Use tile spacers to maintain uniform joints.
Step 5 – Finishing
Allow the adhesive to cure before grouting and avoid heavy traffic until adequate strength has developed.
Best Practices
✓ Prepare only the quantity that can be used within the pot life.
✓ Use the correct notched trowel for the tile size.
✓ Check adhesive transfer by occasionally lifting a tile.
✓ Maintain recommended joint spacing.
✓ Store bags in a cool, dry place away from moisture.
Avoid These Mistakes
✗ Do not mix with cement or sand.
✗ Do not apply over dusty or loose surfaces.
✗ Do not add extra water once the adhesive starts setting.
✗ Do not exceed the recommended tile size.
✗ Do not use for tile-on-tile or submerged applications.



Reviews
There are no reviews yet.